First steps
This page lists first steps you can take after you log in to Cohesivo for the first time. These steps are the most common actions you may need to take in a new site.
Add a content type
1. In your browser, log in to the back office.
2. In the upper-right corner, click the avatar icon and in the drop-down menu disable the Focus mode.
3. Select content and go to content types.
4. Enter the content group and create a new content type.
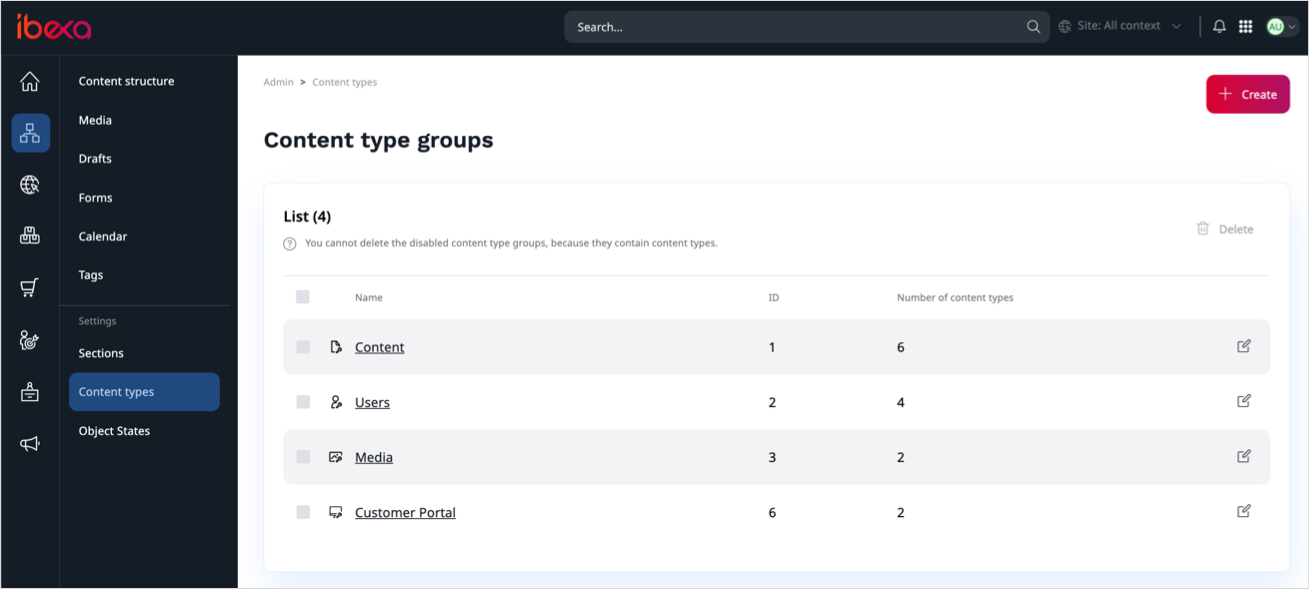
5. Input the content type's name, for example "Blog Post", and identifier: blog_post.
6. Below, add a field definition of the type Text Line. Name it "Title" and give it identifier title.
7. Add another field definition: Text (type Rich text) with identifier text.
Note
Make sure all fields are marked as Translatable. This setting is required to enable content translation for all fields in the created content type.
8. Save the content type.
For more information, see Content model.
Create content
1. Go to the back office, select Content -> Content structure, and create a new content item by clicking Create content.
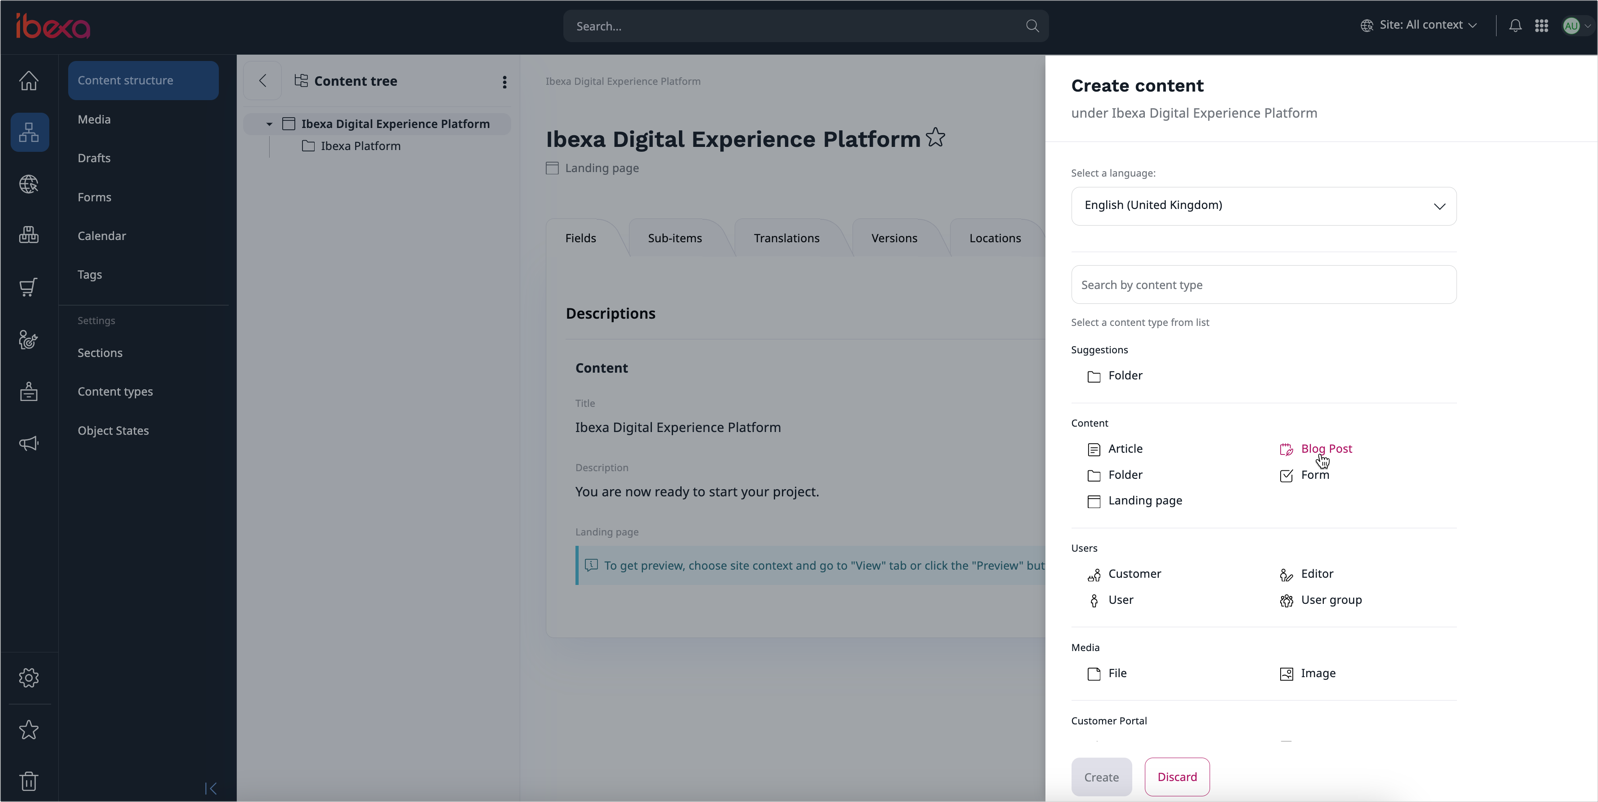
2. Select a Blog Post content type. Fill in the content item and publish it.
Cohesivo is headless, so the published content item is delivered over HTTP rather than rendered by the platform. You can now fetch it with the REST API and display it in your own front end.
For more information, see REST API and REST API authentication.
SiteAccesses
A SiteAccess is a named context in which a request is served. By using more than one SiteAccess you can serve several sites, or several versions of one site, from the same content.
Each incoming request is assigned to a SiteAccess based on matching rules, for example on the host name or on part of the URI. SiteAccesses can be gathered in groups, and many settings are SiteAccess-aware, which means that they can have a different value for each SiteAccess, and fall back to the value set for the group or for all SiteAccesses.
For more information, see Multisite, SiteAccess, and SiteAccess matching.
Add a language and translate Content
One of the most common use cases for SiteAccesses is having different language versions of a site.
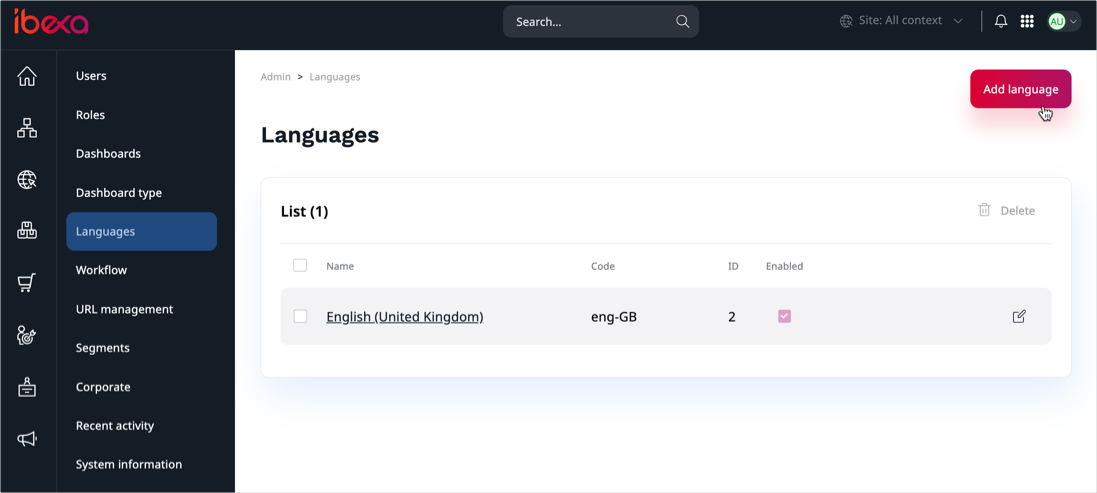
1. Go to the back office and select Admin > Languages. Add a new language called "German", with the language code ger-DE.
Make sure it's enabled.
2. Next, go to the Content structure and open the blog post you had created earlier. Switch to the Translations tab and add a new translation.
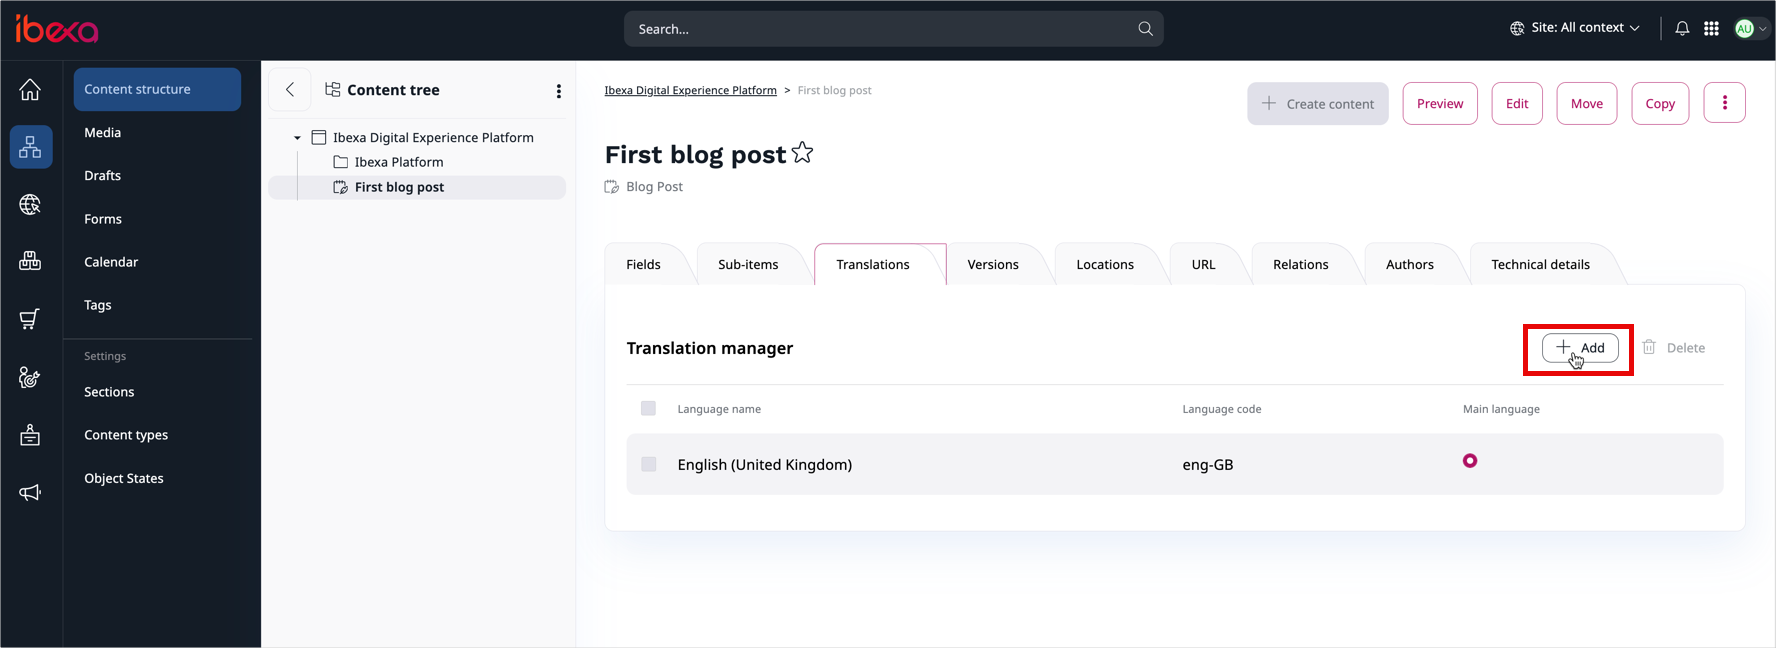
3. Select German as the target language and base the translation on the English source text. Edit the content item and publish it.
The content item now exists in two languages. Which one a visitor gets depends on the languages set for the SiteAccess that serves the request.
For more information, see Languages and Set up translation SiteAccess.
Set up permissions
To allow a group of users to edit only a specific content type (in this example, blog posts), you need to set up permissions for them.
Users and user groups are assigned roles. A role can contain a number of policies, which are rules that permit the user to perform a specific function. Policies can be additionally restricted by limitations.
1. Go to Admin -> Users. Create a new user group (the same way you create regular content). Call the group "Bloggers".
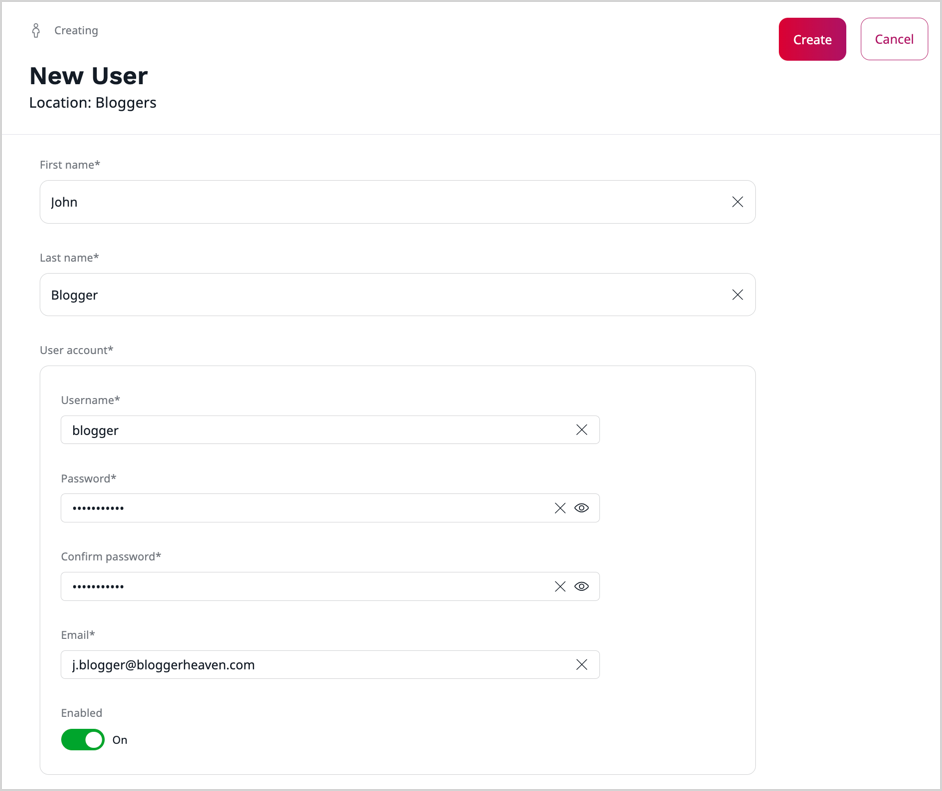
2. In the new group create a user. Remember their username and password. Mark the user as "Enabled".
3. Go to Admin -> Roles. Create a new role called "Blogger".
4. Add the following policies to ensure the user can log in and access content:
User/LoginContent/ReadContent/VersionreadSection/ViewContent/Reverserelatedlist
When creating these policies, don't add any limitations and click Save to proceed.
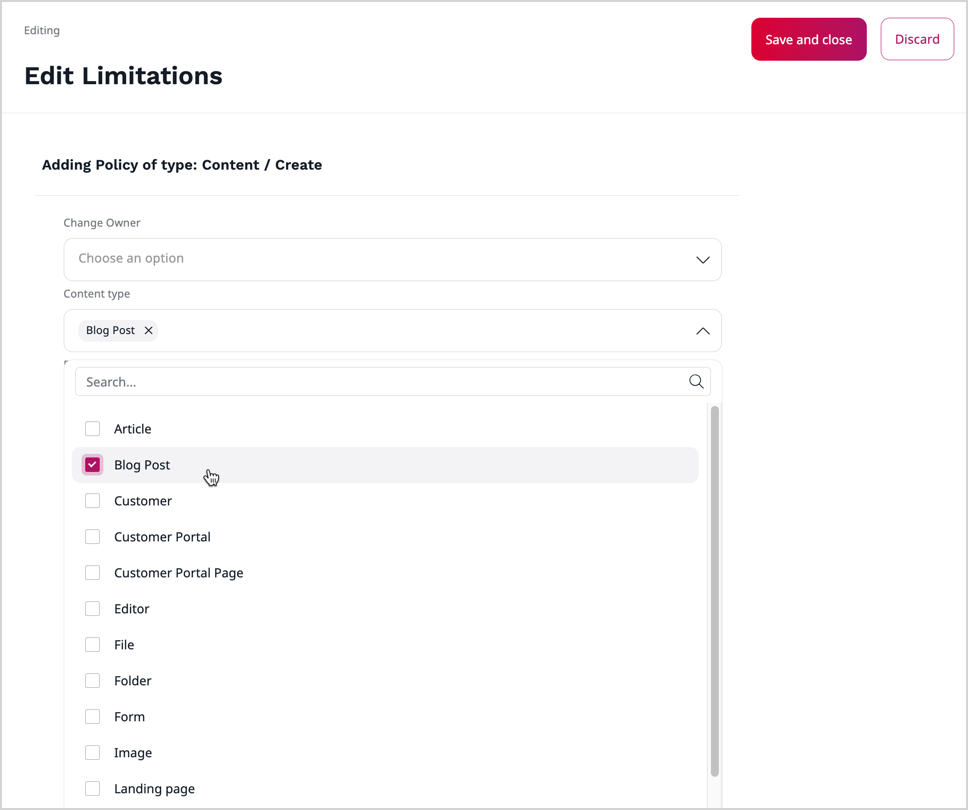
5. Now add policies that allow the user to create and publish content, limited to Blog Posts:
Content/Createwith limitation for content type Blog PostContent/Editwith limitation for content type Blog PostContent/Publishwith limitation for content type Blog Post
6. In the Assignments tab assign the "Blogger" role to the "Bloggers" group.
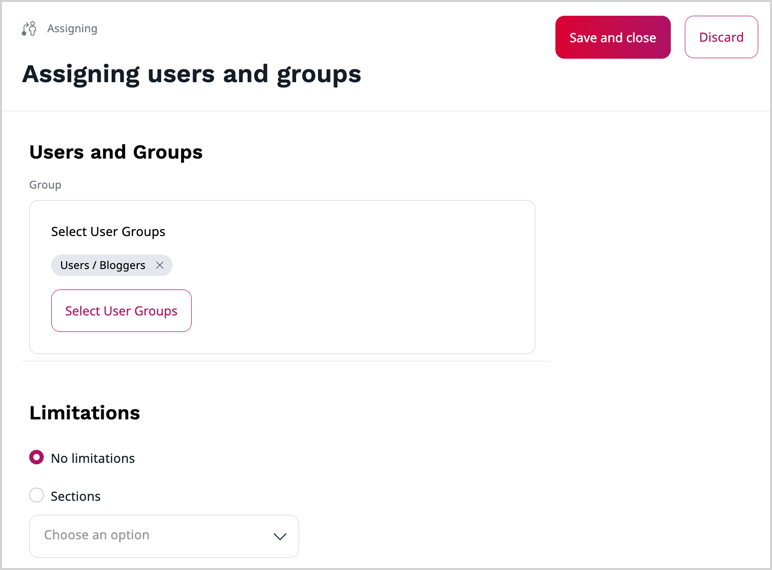
You can now log out and log in again as the new user. You're able to create Blog Posts only.
For more information, see Permissions.